概述
因为jumpserver文件上传下载的功能做的太烂了,所以后来考虑了一下Teleport,Teleport的安装部署非常简单,只需一分钟就可以完成。下面介绍下这款跳板机的安装部署过程。
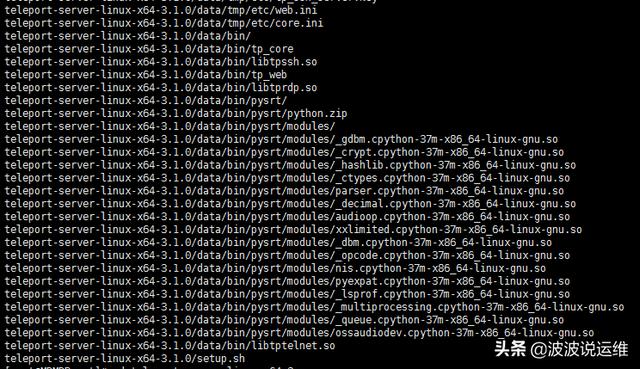
1、解压
# tar -xvf teleport-server-linux-x64-3.1.0.tar.gz
2、安装
# cd teleport-server-linux-x64-3.1.0
# ll
total 16
drwxrwxr-x 2 1000 1000 4096 Sep 17 2018 daemon
drwxrwxr-x 5 1000 1000 4096 Jan 23 15:30 data
drwxrwxr-x 3 1000 1000 4096 Jan 10 14:58 script
-rwxrwxr-x 1 1000 1000 320 Jan 23 15:31 setup.sh
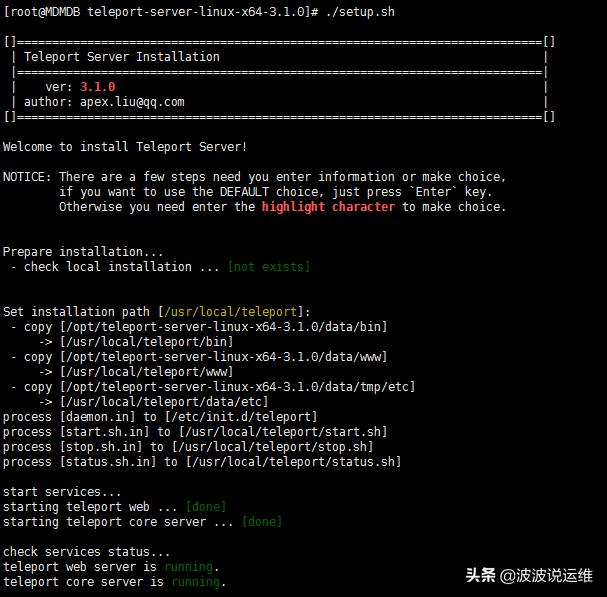
# ./setup.sh
安装时需要指定安装路径,可以使用默认的安装路径/usr/local/teleport(直接回车即可),也可以指定别的路径,请注意路径中不要含有中文字符或空格,以避免出现不可预知的错误。
默认的录像回放文件位于/usr/local/teleport/data/replay目录下,会占用/usr的空间,因此建议安装完成后配置录像回放文件的存储路径。
下面这种情况是因为我一开始centos6.6版本,而安装的teleport是3.2.2版本,需要升级才行,因为比较懒,所以我就改成teleport 3.1的版本,直接跳过这个问题。
3、初始化配置
初次安装完成后,可以访问 http://你的teleport服务器IP:7190/(http://172.16.20.113:7190/)进行初始化设置。( 我选的 mysql 5.7 )
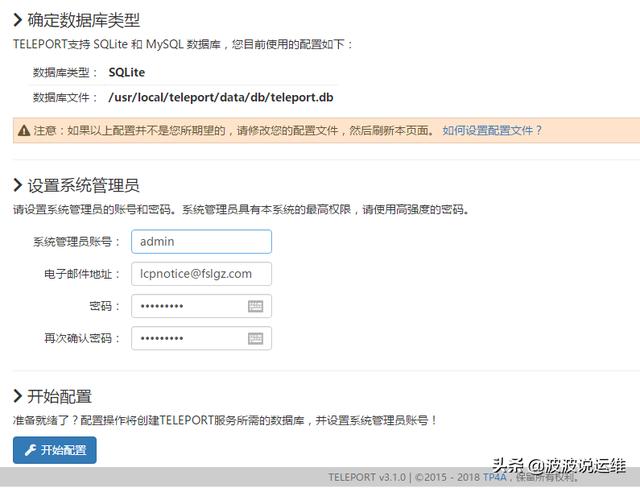
初始化设置时,需要确定使用的数据库类型。Teleport默认使用内建的sqlite3数据库,因此无需额外安装数据库服务即可开始使用堡垒机的各项功能。如果您希望使用MySQL数据库,请在初始化之前进行MySQL数据库配置。
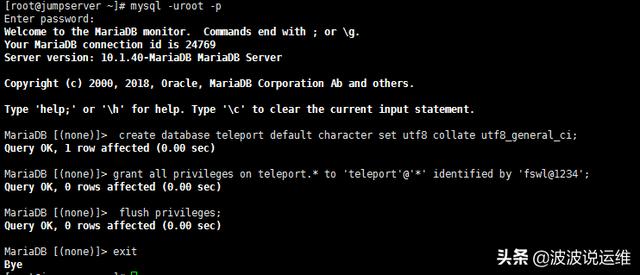
teleport支持MySQL数据库(当然也支持MariaDB)。这里以MySQL为例进行说明。要使用MySQL数据库,需要先为teleport创建库并授权。以MySQL数据库的管理员身份在命令行工具中执行: 注意:数据库的字符集必须是 utf-8 ,否则会出现乱码。
3.1、配置mysql
安装完成后建库及授权
mysql> create database teleport default character set utf8 collate utf8_general_ci;
mysql> grant all privileges on teleport.* to 'teleport'@'*' identified by 'fswl@1234' with grant option;
mysql> grant all privileges on teleport.* to 'teleport'@'localhost' identified by 'fswl@1234';
mysql> flush privileges;
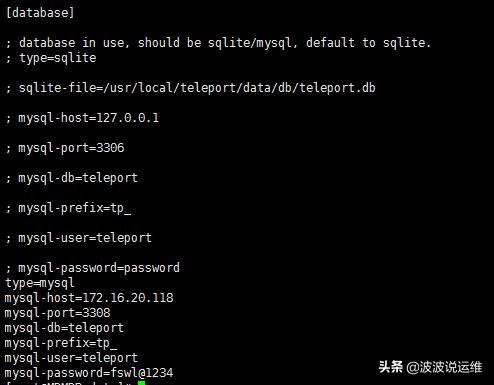
3.2、修改 /usr/local/teleport/data/etc/web.ini
[database]
; database in use, should be sqlite/mysql, default to sqlite.
; type=sqlite
; sqlite-file=/usr/local/teleport/data/db/teleport.db
type=mysql
mysql-host=172.16.20.118
mysql-port=3308
mysql-db=teleport
mysql-prefix=tp_
mysql-user=teleport
mysql-password=fswl@1234
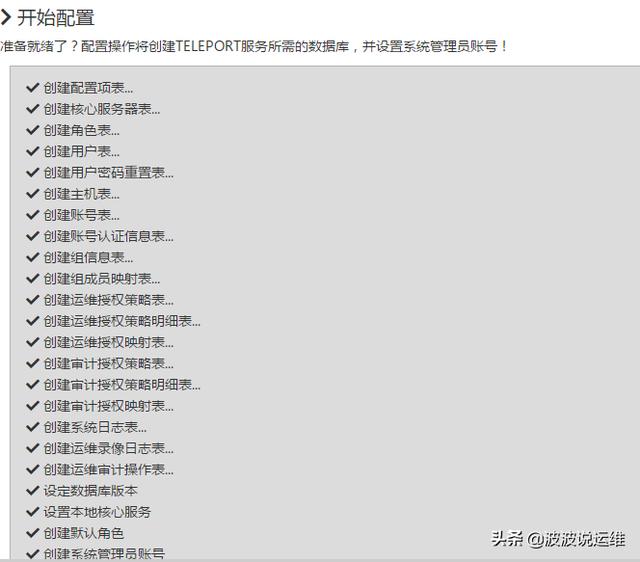
4、 页面配置
刷新网页后进行配置,完成后登陆界面(http://172.16.20.113:7190/)
这里偷懒所以就不配置mysql了。
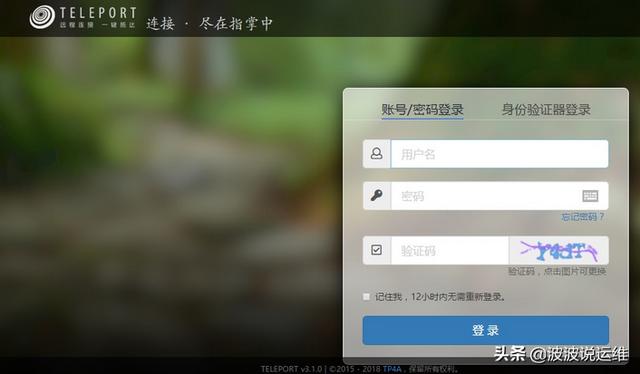
5、登陆
输入地址:http://172.16.20.113:7190
6、teleport服务管理
Teleport 有两个服务:核心服务 core 和网页服务 web。两个服务可以同时启动、停止、重启,也可单独操作其中的一个。
操作完整的 teleport 服务:
-
启动: /etc/init.d/teleport start
-
停止: /etc/init.d/teleport stop
-
重启: /etc/init.d/teleport restart
-
查看运行状态: /etc/init.d/teleport status
仅操作核心服务 core:
-
启动: /etc/init.d/teleport start core
-
停止: /etc/init.d/teleport stop core
-
重启: /etc/init.d/teleport restart core
仅操作网页服务 web:
-
启动: /etc/init.d/teleport start web
-
停止: /etc/init.d/teleport stop web
-
重启: /etc/init.d/teleport restart web
7、 修改web访问端口( 可选附加 )
配置文件说明官方文档: https://docs.tp4a.com/config/#_1
默认情况下,teleport的WEB服务使用7190端口,安装后可按如下地址访问:
http://您的堡垒机IP地址:7190
如果需要更改默认端口号,请修改配置文件(注意,两个配置文件均涉及到web端口,要一并修改)。
/usr/local/teleport/data/etc/web.ini
/usr/local/teleport/data/etc/core.ini
重要提示:修改完配置文件后,需要重新启动teleport服务使修改生效.


 京公网安备11010602022021 京ICP备11016550号-7号 24小时客服QQ 504927 客服微信 504927